Archive | Uncategorized RSS feed for this section

Chocolate orange bundt cake

23 Apr

Image

This is one of my favourite cakes to bake and eat so I was gobsmacked that I hadn’t blogged it already. I searched my blog twice, convinced that I must have already shared such a fab cake with everyone but I hadn’t. MAJOR oversight.

I used a recipe is called ‘Anna Encel’s Wonderful Babka’ in a fav cookbook of mine called ’50 Fabulous Chocolate Cakes’ that gets a major workout in my kitchen.

Like I tend to do I reduced the amount of sugar by half a cup. The original recipe called for 3 tablespoons of drinking chocolate which I changed to melted chocolate. I normally use 100grams of dark chocolate but this time I broke up one of the many milk chocolate Easter bunnies that my girls got for Easter and used that instead. Shhh, don’t say a word….

Image

Gather:

250g butter, melted

3 large eggs

2 ½ cups self-raising flour

1 cup caster sugar

100g melted dark chocolate

1 ½ cups orange juice

½ tsp orange liqueur [optional]

ImageImage

Let’s get to it:

Preheat oven to 180C and thoroughly grease a bundt tin, ensuring you get into all the crevices.

Put all the ingredients except the melted chocolate into the bowl of an electric mixer and beat until well combined.

Pour one half of the mix into the bundt tin then dollop in the melted chocolate. Cover with the remaining batter

Bake 40-ish minutes [depending on your oven you may need another 5 or so minutes]

Allow to cool in tin for about 30 minutes before tipping onto wire rack.

Chocolate fudge birthday cake

3 Mar

Image

It was my baby brother’s birthday recently and a cake was absolutely in order. By baby I meant he is nudging the upper end of his 30s but in my heart he’s still the funny little boy who used to fall asleep standing up while playing with Matchbox cars.

My mum hosted a family lunch and bought my bros an ice-cream cake – sort of as a joke, sort of because he actually requested one. Obviously a real, actual chocolate birthday would also be needed.

I found the ideal recipe in David Herbert’s Best Ever Baking Recipes and it was not only a snap to make, it turned out exactly like the photo in the book! Huzzah! It tasted rich and fudgy and decadent – a perfect birthday cake.

Gather:

100 g butter, diced, at room temperature

2 large eggs, lightly beaten

250g caster sugar

100g dark chocolate melted

280g self-raising flour

1 teaspoon bicarb

2 tablespoons cocoa

250ML milk

1 tablespoon lemon juice

Image

 Let’s get to it:

Preheat oven to 180C and grease a 20cm springform tin and line the base with baking paper.

Combine butter, egg, sugar and meted chocolate in a large bowl. Sift in flour, bicarb and cocoa.

Combine milk and lemon juice in a small jug (it should curdle slightly) and pour into the bowl.

Beat with hand held beaters or spoon for 2minutes / until smooth.

Pour into tin and bake for 50 minutes/ until a skewer comes out clean. Cool for 10 minutes before turning out to wire rack to cool.

When cold dress with ganache [I cheated and tried a new product I’d seen in the chilled section – Philly chocolate frosting. It tasted good & is perfect for when you don’t have time to whip up ganache].ImageImage

Lemony cupcakes with crushed raspberry icing

10 Feb

Image

I had a hankering to bake something lemony this morning and trawled though pinterest, fav websites and some blogs. What caught my eye was a recipe for lemony cupcakes in the book After Toast by food writer Kate Gibbs.

Simple and light they are perfect for a morning tea when dusted with sifted icing sugar. Ms Gibbs includes a recipe for lemon icing but I instead used a crushed raspberry icing that Miss 7 had made for something she was baking [I’ll upload that recipe soon]. I then topped each cake with a single raspberry to make them look extra pretty and more suitable for the evening birthday soiree that I’ll be taking them to.

ImageImage

GATHER:

125g diced butter at room temperature

¼ cup caster sugar

zest for one large lemon

2 free range eggs

2 cups self-raising flour

vanilla


LET’S GET TO IT:

Preheat oven to 180C and line cupcake tin with wrappers [this made 12 large muffins and 6 small, patty-cake size ones].

In bowl of electric mixer cream butter then add sugar until soft and combined. Add vanilla, zest then eggs one at a time.

Gently fold flour in, alternating with milk,on low speed until smooth.

Spoon into cases and bake for between 12-15 minutes/ until golden.

Remove from oven, place on wore rack and allow to cool before adding any icing.

Image

Toffee chip blondies – easy and yummy

3 Feb

Image

My cousin by marriage is Canadian and as a fellow baker understands my obsession with all things sweet and home-made. The very lovely Heather and her family spent Christmas with us in 2012 and regularly had to listen to my gripes about the lack of creative baking supplies available in Australia. As a surprise she sent me two boxes of various chips: cinnamon, mint, toffee, peanut butter: the types of things I read about but could never pin down. I may or may not have done a real, actual happy dance on receipt of these delish morsels.

When I saw this recipe on the labyrinth-like food.com I couldn’t wait to bake it. So simple and so delish – nibble one little corner and give the rest away, like I did.

Image

Gather:

115grams butter, diced, at room temperature

3/4 cup brown sugar

2 eggs

2 cups all-purpose flour
1 teaspoon baking powder
1/2 teaspoon baking soda
1/4 teaspoon salt
100g English toffee bits 

Let’s get to it:

Preheat oven to 170C and grease and line a 9×13 pan.

Beat butter, sugar and eggs in bowl of KitchenAid until creamy and well-combined.

Stir in flour, baking powder, baking soda, and salt and toffee bits, reserving a bit.

Bake 20 – 26 minutes: you want it to be moist like a brownie, not dry.

Remove from oven and sprinkle over remaining toffee chips.

Allow to cool for 10 minutes or so before slicing into chunky squares.

ImageImageImage

Chocolate peanut butter brownies – perfect for Christmas Day

11 Dec

Image

Chocolate and peanut butter is always a winning combo and makes a perfect foil to all that fruit cake’n’pud traditionally offered around the Christmas table.

This easy-peasy brownie would also make a fab addition to any Christmas parties or festive barbecues.  You’ve probably got all six ingredients in your kitchen so why not make a pan of this right now? You will thank me later…

The recipe was found on BBC Good Food’s site, a fabulous place to while away the hours. I added some roasted, salted peanuts on top and boy did it make this sweet sing.

Image

GATHER:

225g crunchy peanut butter

200g dark chocolate, broken into pieces

280g soft light brown sugar

3 medium eggs

100g self-raising flour

handful roasted, salted peanuts

handful dark chocolate drops

LET’S GET TO IT:

Preheat oven to 180C and grease and line a 20cm pan with non-stick baking paper.

Melt peanut butter, chocolate and sugar in a pan over low heat, stirring occasionally, until the sugar has just about melted.

Turn off heat and use a wooden spoon to beat in the eggs one by one then stir in the flour.

When everything is mixed in pour into tin, then dot the peanuts and dark chocolate drops on top.

Bake 25-30 minutes, until top is firm but inside still fudgy.

Cool and cut into squares.


ImageImage 


Donna Hay baked cheesecake

21 Oct


Image

I’m not one to blow my trumpet but this is probably the best cake I’ve ever made. Considering I am somewhat addicted to baking this is a big call. As always Donna Hay has produced a recipe that results in a gorgeous, melt-in-the-mouth baked cheesecake that is tart yet sweet at the same time. Not cloyingly sweet, just perfect sweet. Continue reading

24 Sep

Aussie food bloggers, would you like to be part of a foodies parcel scheme? The lovely Awanthi @ Sybaritic Pleasures is keen to get some more bloggers involved. I can’t wait to get my first parcel!

Dark chocolate lace cookie biscuits

7 May

Image

I’ve come across these biscuits before with different names but I think the genius cooks at The Australian Women’s Weekly have bestowed upon these sweet morsels the best name: chocolate lace crisps. Once again this recipe is from their bible Bake.

I’ve made these many times and despite not having an overly sweet tooth I adore them. According to the notes I’ve scrawled in my cook book I first made them for a mother’s day picnic in 2010 and I made them recently for another picnic that was called off [due to bad weather]. In fact I love them so much that they are used as my WordPress image.

These are so delicious due to the dark chocolate so make sure you don’t use nasty compound stuff or they won’t taste anywhere near as good.

GATHER:

100g chopped dark chocolate

80g butter, diced

1 egg

¾ cup caster sugar [or even a smidge less]

1 cup plain flour, sifted

2 tablespoons cocoa powder

¼ teaspoon bicarb of soda

¼ cup sifted icing sugar

LET’S GET TO IT:

Place chocolate and butter in a medium sized pan and melt over a very low heat until glossy and smooth.

Remove from heat, allow to cool for about five minutes, then stir in sugar, cocoa, flour, soda and egg.

Place in fridge for 10-15 minutes or until mix is firm enough to handle.

Heat oven to 180C and line two baking sheets with baking paper.

Place icing sugar on a small plate.

Make a ball [about the size of a golf ball] with mixture, roll in icing sugar and place on baking tray.

Bake 12-15 minutes and cool on trays.

See my Hungry Mum column in Thursday’s Leader here.

Homemade strawberry jam with super easy scones [afternoon tea is ready!]

29 Apr

Image

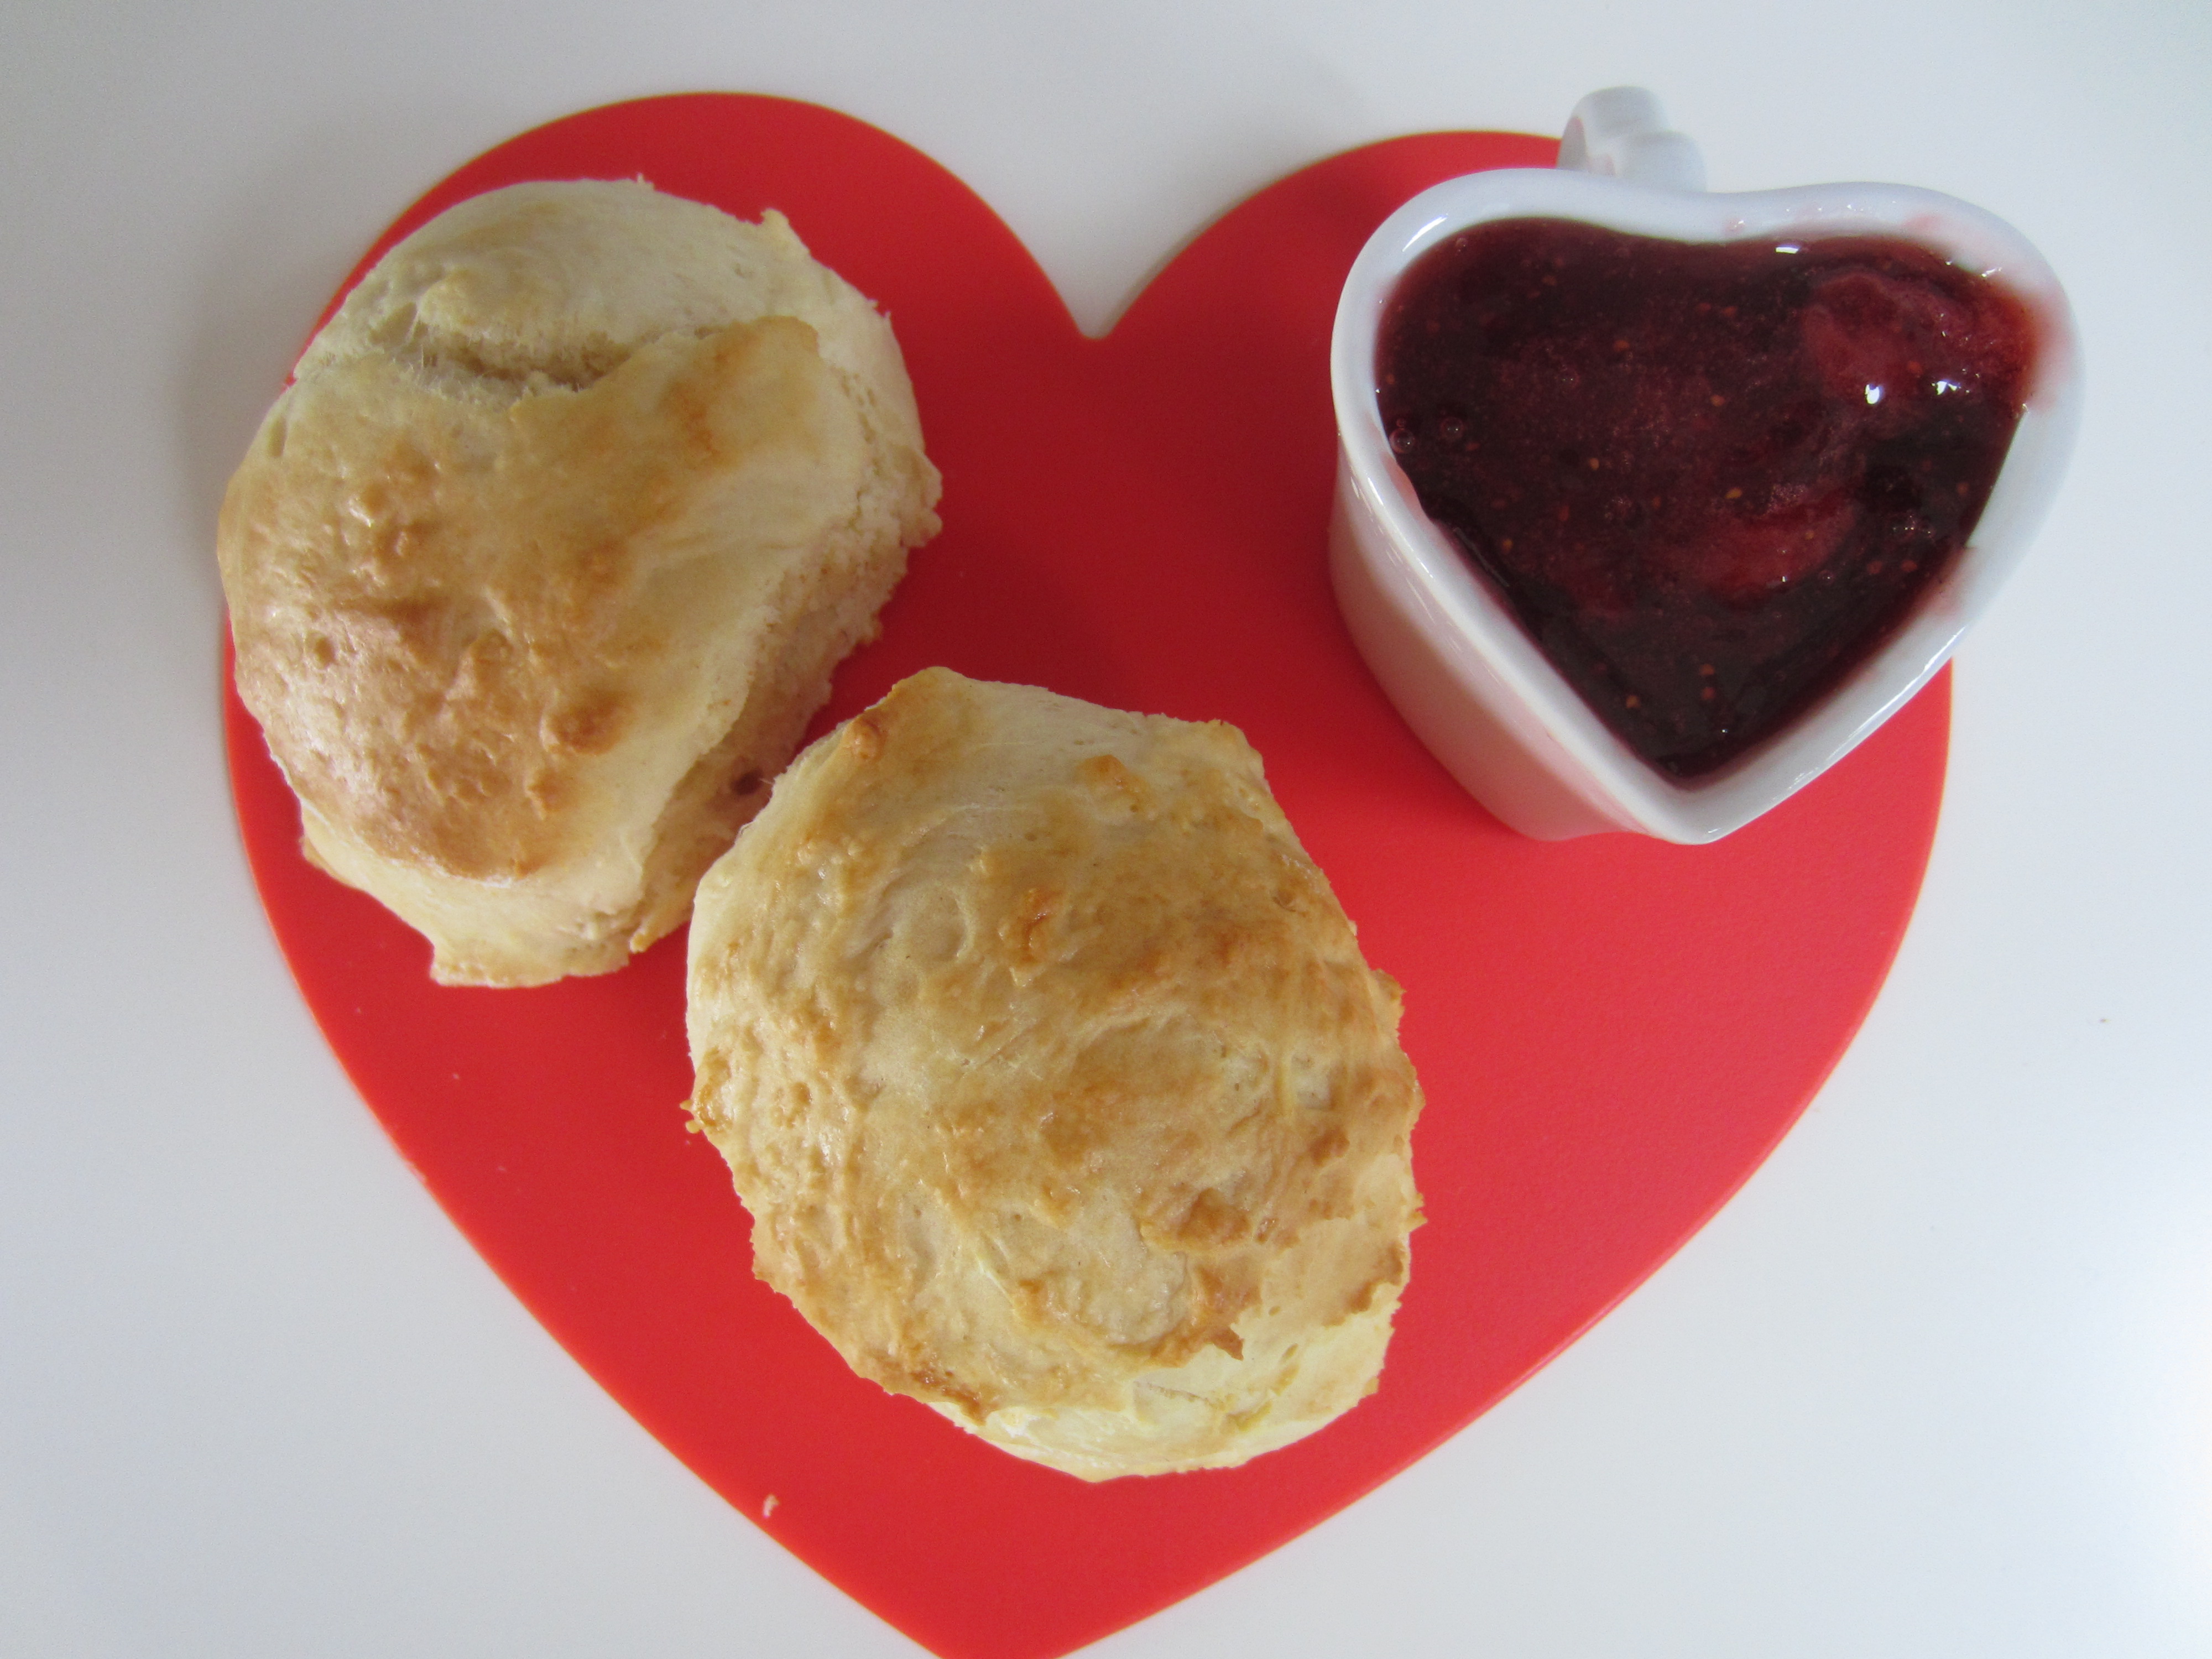
I adore a tea – be it Devonshire, high or afternoon I think it is all wonderful. I would have been right at home in the Victorian era: nibbling on dainty sandwiches, sweet morsels and pillow soft scones. Ahhh, it is all about the scones. For as much as I adore a freshly made scone I’m not too fond of the mess they make of my bench tops. I’m not a clean freak but nor am I fan of scraping remnants of dough off my countertops.

But every so often the need for scones hits and when it does this easy peasy 3-ingredient recipe is the one I reach for. It is child’s play and produces light, floaty scones with a lovely colour. The recipe has been around forever so I’m not sure who to credit for it.

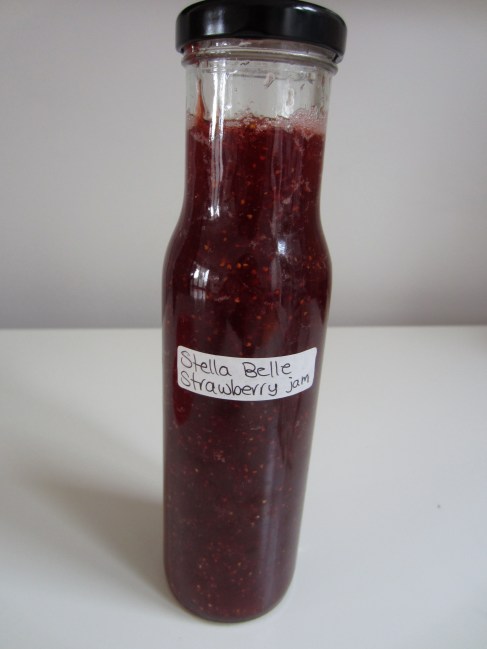
And what are freshly made scones without a real, fruity strawberry jam? I’d been wanting to make strawberry jam for ages but every time I bought the required two punnets of berries my fruit bat daughters would devour the lot. So last time I saw strawberries on sale I bought three punnets, cut one up for the fruit bat daughters then set about making this jam with fruit bat daughter number one. Having never made any type of jam before I picked an easy recipe from kidspot.com.au that called for it to be made in the microwave. It tasted amazing but I don’t know that it would have been any quicker than using the stovetop recipe. It made a sticky mess of my microwave but beauty is pain…

Miss 6 loved the fact we made & labelled our own jam. A gorgeous vintage label wold have looked waaaaay better than my slapdash attempt but I’ll remember that for next time.

EASY THREE INGREDIENT SCONES:

GATHER:

325g self-raising flour

2/3 cup cold lemonade

2/3 cup thickened cream

LET’S GET TO IT:

Preheat oven to 200C and spray a baking sheet with non-stick spray.

Sift flour into a large bowl. Combine lemonade and cream in a jug and pour to the flour bowl. Gently mix until just combined – it will be very sticky.

Tip onto a lightly floured surface and gently knead until about 3cm thick. With floured scone cutters or a glass cut out scones and place side by side on the tray.

You can brush the tops with a smidge of milk if you like but it isn’t absolutely necessary.

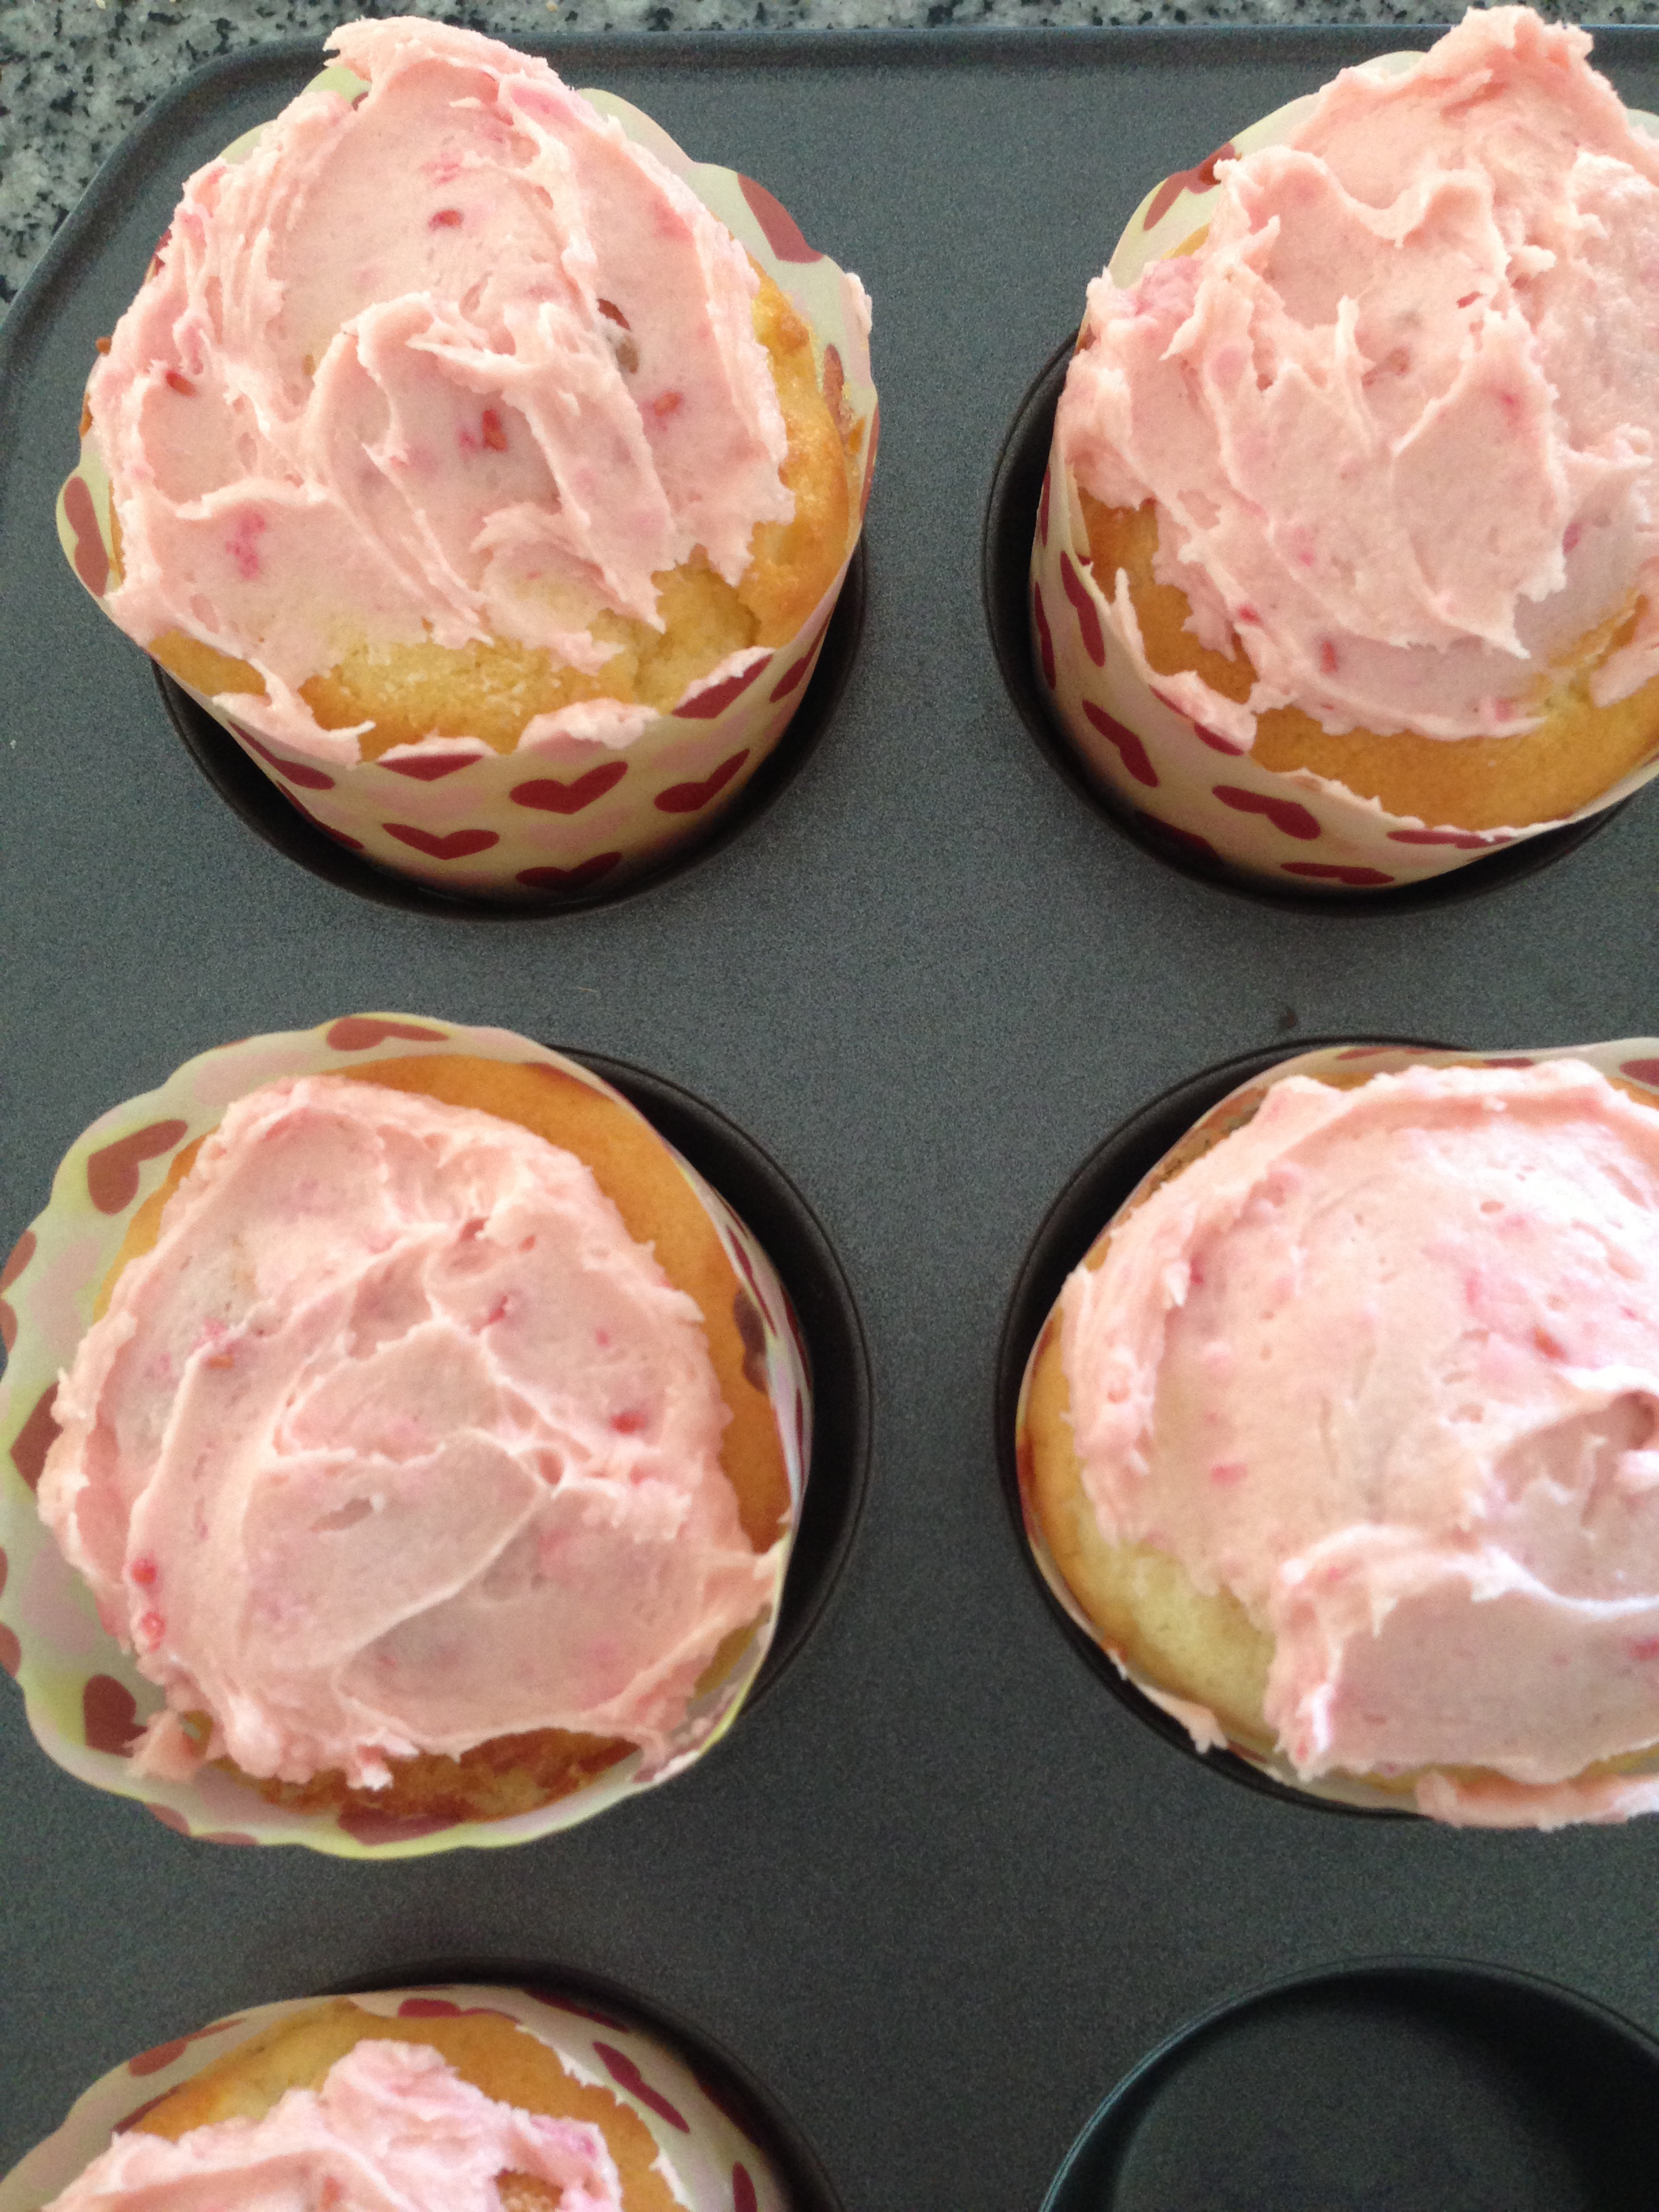
Bake for between 12 and 15 minutes/until pale golden. Serve warm with strawberry jam

and cream.

STRAWBERRY JAM

Image

GATHER:

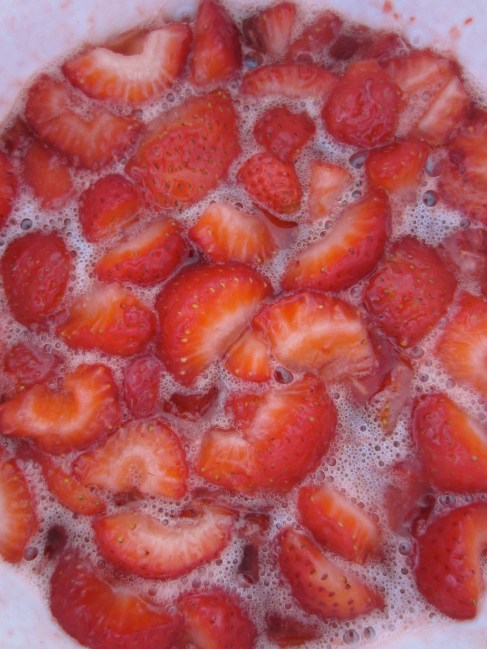
Two punnets of strawberries, washed, hulled and roughly chopped

1 1/4 cups caster sugar

1/4 cup lemon juice

LET’S DO IT:

Put a saucer in freezer [you’ll need this to test the jam later]

Put strawberries, sugar and lemon juice in a very large and deep microwave-safe bowl.

Leave for 15 minutes to allow the strawberries to soften.

Place in microwave and cook on high for 4 minutes, stopping every minute to stir the jam to ensure sugar is dissolved.

Microwave a further 25-30 minutes on high, stirring every 5 minutes or until the jam reaches setting point. (To check, place a spoonful of jam on the cold saucer and place it in the freezer for two minutes. Run your finger through the jam and if it stays in two separate portions it is set.)

Leave to cool for five minutes then gently decant into a sterilised glass jar.

ImageImageImage

Chocolate ginger cupcakes with rich chocolate glaze

16 Apr

Image

This recipe is from a book called [take a deep breath] Green & Black’s Organic Ultimate Chocolate Recipes The New Collection. The recipe is ‘the Hummingbird Bakery’s ginger chocolate cupcakes’ and I made these for my mum at Easter, who adores choc ginger. 

GATHER:

100g plain flour

1/2 tablespoon baking powder

140g caster sugar

20g cocoa powder, sifted

40g butter at room temperature

100mL full at milk

1 egg

1 heaped teaspoon powdered ginger 

LET’S GET TO IT:

Preheat oven to 170C and line cupcake pan with wrappers. I used a muffin pan and made larger sized cakes.

In an electric mixer combine butter, sugar, flour, baking powder, ginger and cocoa until all mixed together.

Combine milk and egg in a jug, whisk and add to the mixture in two lots. Mix until everything is combined.

Fill wrappers two thirds full and bake for 15-ish mins [for small sized cupcakes] to 20-ish [muffin size].

Remove to wire rack to cool completely.

The book had a choc/ginger icing combination but I used my go to, fool-proof Donna Hay chocolate glaze recipe: mix 1/2 cup of cream with 150g dark chocolate in a small pan. Stir over low heat until melted and smooth. Remove from heat; allow to stand 10 mins until thickened. Pour over a well chiled ckae and tap to remove air bubbles. I usually have a container of this in the fridge and use it for ice cream topping [a few seconds in the microwave makes it gooey and warm], icing for cakes and slices, and eaten by the spoonful…  it is good just to have on hand…

I decorated mine with little edible silver balls because they are pretty. Ginger crystals would have been the logical decoration.